


In today's visually-driven digital landscape, images play a pivotal role in enhancing user engagement and conveying information effectively. Whether it's a social media platform, an e-commerce website, or a portfolio showcase, incorporating images is essential for creating captivating user experiences. As developers, it's crucial to provide users with the ability to manage their images seamlessly. In this comprehensive guide, we will explore the practical implementation of CRUD (Create, Read, Update, Delete) operations for image management using Firebase and React.
Prerequisites
This blog is a continuation of our previous articles on User Authentication and Image Upload.
I highly recommend that you first go through "User Authentication" and "Image Upload" Blogs to familiarize yourself with the concepts and methods that will be discussed in this article.
Let's build on what we've learned so far and expand our knowledge by exploring the implementation of Delete and Update functionality for Images in this blog.
Getting Started
First, go to the project inside your Firebase console and check if the previously stored images are saved in your Firebase Storage.
If yes, this means that you have successfully implemented the Image Upload Functionality.
If not, then you must refer to my previous blog "Image Upload using React and Firebase Storage".
Deleting Images in React
Inside your existing project:
Refer to the following code changes and add them accordingly ⏩
Create the
DeleteImagecomponent: Build a separate component responsible for handling image deletion.Implement delete functionality: Inside the
DeleteImagecomponent, implement the logic to handle image deletion. This can involve displaying a delete button and setting up an event handler to trigger the deletion process.function DeleteImage({ imageUrl, onDelete }) { const handleDelete = async () => { try { const imageRef = ref(storage, imageUrl); await deleteObject(imageRef); onDelete(); // Callback to update image list in parent component } catch (error) { console.error(error); } }; return ( <button className="delete-button" onClick={handleDelete}> Delete </button> ); } export default DeleteImage;Import the
DeleteImagecomponent into yourProfile.jsxfile and use it to display the delete functionality for each image.import DeleteImage from './DeleteImage';Replace the existing delete button in the
Profilecomponent's map function with theDeleteImagecomponent:{imageList.map((url, index) => ( <div key={url} className="image-container"> <img src={url} alt="img" /> <br /> <DeleteImage imageUrl={url} onDelete={() => handleDeleteImage(index)} /> {/* ... */} </div> ))}
Wooh!! You have successfully implemented the Delete functionality in your React Project. The particular image will now be dynamically removed from the webpage.
Updating Images in React
Take a look at the following steps to update the images in Firebase ⏩
Create a new file called
UpdateImage.jsxDefine the
UpdateImagecomponent:function UpdateImage({ imageUrl, onUpdate }) { const handleUpdate = (event) => { const file = event.target.files[0]; if (file) { const imageRef = ref(storage, imageUrl); uploadBytes(imageRef, file) .then(() => { onUpdate(); // Callback to update image list in parent component alert('Image updated successfully'); }) .catch((error) => { console.error(error); }); } }; return ( <div> <input type="file" accept="image/x-png,image/jpeg" onChange={handleUpdate} /> <br /> <small>Select a new image to update</small> </div> ); } export default UpdateImage;Import the
UpdateImagecomponent at the top of theProfile.jsxfile:import UpdateImage from './UpdateImage';Replace the existing update button in the
Profilecomponent's map function with theUpdateImagecomponent:{imageList.map((url, index) => ( <div key={url} className="image-container"> <img src={url} alt="img" /> <br /> {/* ... */} <UpdateImage imageUrl={url} onUpdate={fetchImages} /> </div> ))}Modify the
fetchImagesfunction in theProfilecomponent to fetch the updated image list after an image is successfully updated:const fetchImages = async () => { try { // ... const urls = await Promise.all( response.items.map(async (item) => { // ... }) ); setImageList(urls); } catch (error) { console.error(error); } };
The UpdateImage component handles the image selection and upload process, and the image list is updated dynamically after a successful image update.
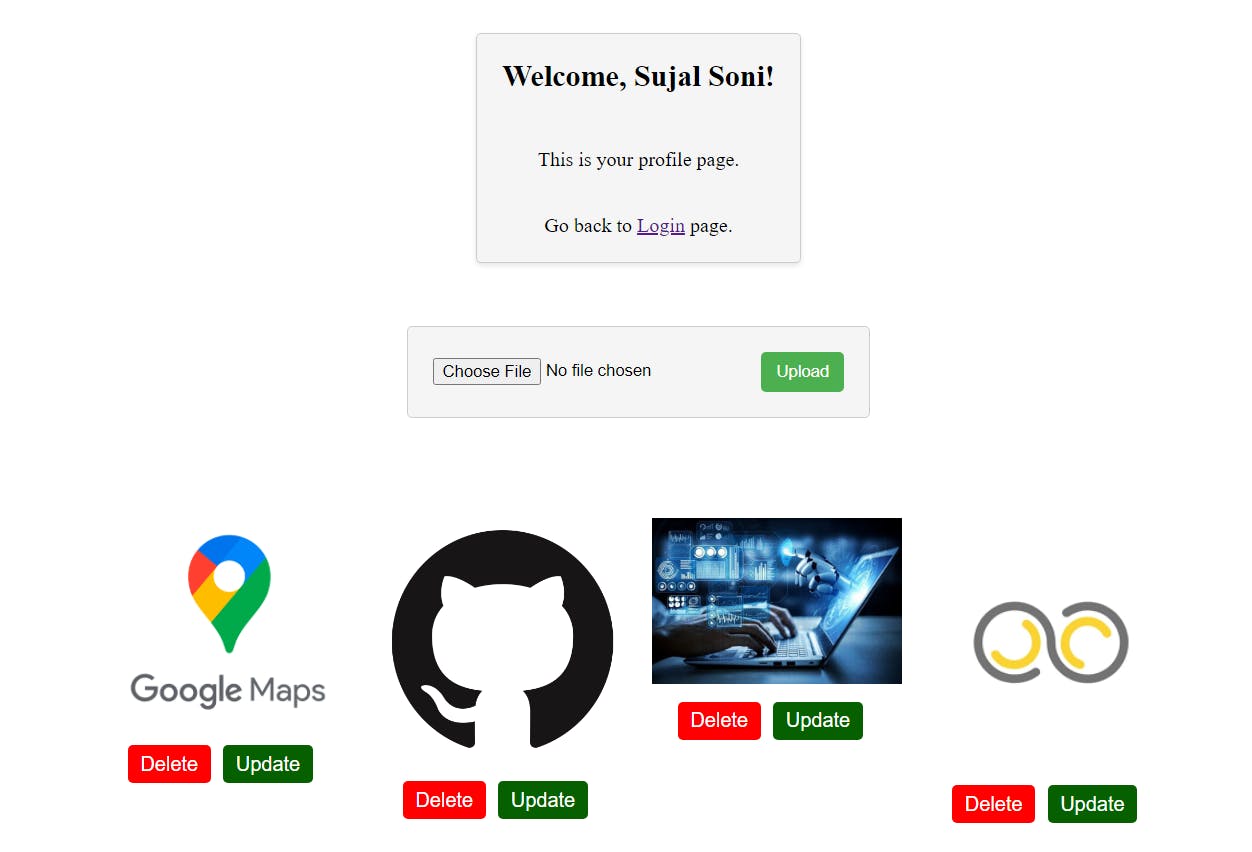
Project Snippet


Conclusion
Bingo‼️ You have successfully implemented the Delete and Update functionality for images in your application! By following the steps outlined in this blog, you have empowered your users to effortlessly manage their images with ease.
Feel free to include your custom CSS to the existing code and make it your very own.
If you encounter any difficulties or have any questions regarding the implementation of the Delete and Update functionality for images, feel free to reach out to me on LinkedIn 💯
Additionally, if you would like to obtain the full source code of the project or explore more advanced features, don't hesitate to get in touch. 🙂